Showing posts with label landscapes. Show all posts

Tuesday, July 19, 2011

Same View, Different Color


Lake Superior Sunset, Lavender, Pastel 4.25" x 4.25"

Here is another image in the "Twilight" series. The colors in my paintings often bear no resemblance to the local colors I see. However, this and last week's post really do represent the amazing light changes one can experience on Lake Superior's north shore. In both cases the colors are accurate. The light is really gorgeous there. It is a wonderful place to be and a real treat for a painter.

The fact that it is 66 degrees Fahrenheit in Grand Marais right now while we are sweltering in record humidity and temperatures in White Bear Lake makes the lure of the cabin a strong one.


Friday, July 8, 2011

Luminous Twilight Colors

Lake Superior Sunset, Peach Pastel, 4.25"x4.25"


This small painting was done looking west along the shore of Lake Superior to what is known as the Sawtooth Mountain Range.


I started this painting with a watercolor wash to lay in some complementary colors to the pastels used to render the final image. You can see the texture of of the cold pressed Arches watercolor paper. The texture worked out well to help me show both the small waves on the water and the rough rocks of the shoreline. I primarily used Rembrandt and Unison pastels and then put in some details with Carb-Othello pastel pencils.


Pastels work especially well to capture the luminous colors of the long twilight along the north shore of Lake Superior. We are located about forty miles from the Canadian border where in midsummer twilight lasts until after 10 PM on the summer solstice--noticeably longer than twilight in Minneapolis and St. Paul. Not quite the same as the "White Nights" of a Scandinavian summer, but almost.


As I sit here describing this painting, I realize the titles of this series should have been "twilight" not "sunset." Too late: the titles are posted on the gallery walls. If you want to see them in person go to Betsy Bowen's gallery in Grand Marais, Minnesota. The Summer Underground Show will be there until July 27.


Wednesday, October 21, 2009

New Show

The University of Minnesota Morris is the setting of the lastest Project Art for Nature (PAN) Show. I'll be exhibiting along with twelve other artists. PAN is a collaboration of artists and illustrators from Minnesota and Wisconsin who work independently and collaboratively to create artwork which promotes stewardship of threatened natural areas.


Dusk, 6 x16 1/2", pastel

The two locations I focus on for the PAN collaborative are the area near our cabin on the north shore of Lake Superior and the large open space between Bald Eagle Lake and Otter Lake, two of the many lakes in the Twin Cities area in Minnesota. The open space is filled with meadows, woods and marshes. The imagery of the marshes is often found in my art.


Evening, 5 x 16 1/2", pastel

The two small pastels above will be in the Morris show along with several other pastels and a set of four monotypes. 20% of the proceeds from sales of the art work are donated to non-profit environmental conservation organizations.

The show opens tomorow, Thursday, Ocotber 22, 7-9 pm at the Humanities Fine Art Gallery, University of Minnesota Morris. 104 Humanities Building, 600 East 4th St., Morris, MN. Gallery hours are Monday-Thursday: 9 am - 8 pm; Friday: 9 am - 6 pm; Sunday: pm - 4 pm.

Please come see the show if you are in the area.


Thursday, October 15, 2009

Evening Painting

Evening is my favorite time of the day to be painting. The light is luminous and the shadows are deep. Best of all, I have to put myself on auto pilot and just paint; no second guessing, no overthinking. Why? The light is fading fast forcing me to make decisions and stay with them. Otherwise I can get caught in the plein air landscape painter's trap of chasing the light.

The painting above was done on my recent trip to Utah. The sun was just setting. Cottonwoods were catching the last direct rays and were lit up to a chome yellow and the field in front of them was still sunny. Everything else was in that sort of early evening mountain shadow where they were gently illuminated by the reflected light from the sky.


The painting above was done another day but also in the early evening. (Actually it is the third painting done the day I painted the two from the last post.) As you can see, neither has much blue in the sky. Just a faint bit in the part farthest from the sun. So the yellow light of the sky is present in the rest of the landscape and influenced my choice of pigments. Doing a bit of forensics will help me remember my instinctive, auto-pilot choices since I foolishly did not take good notes. Now that I'm back home and attempting some studio paintings with these as reference I sure wish I know exactly what I used. Another lesson learned.

Here is a lesson I did learn: The advice that one should always lay out one's palette the same way is smart. When you obey this rule you don't have to wonder if you are dipping into cobalt or ultramarine or violet or alizarin in the dark. Believe me, after the sun goes down, they look alike.

Both paintings were done on gessoed board. The two above each had one coat of regular white acrylic gesso and one coat of clear acrylic gesso. I like the bit of tooth given by the clear acrylic gesso but I have wondered if it causes too much of the paint to be absorbed. I use a bit of odorless solvent but no medium. The result are paintings that dry relatively quickly (a day or two) and have a matte finish except where I have laid on really thick layer of paint.

I took a wonderful workshop from Marc Hanson this summer and have been using his suggested palette with the addition of Ultramarine Violet:

Titanium White, Cadmium Yellow Light, Cadmium Yellow Deep, Cadmium Red Light, Permanent Alizarin Crimson, Magenta, Light Red, Transparent Red Oxide, Ultramarine Blue Deep, Cobalt Blue, Viridian, Yellow Ochre.

This a nice palette for landscapes--especially representational ones.

Last week I went to a lecture by a representative of Gamblin Oil Colors which prompted me to drive to Wet Paint to get some new pigments. Stay tuned!

Sunday, October 4, 2009

What I Saw

My husband Eric and I just returned from a trip West to get out annual mountain fix. To accommodate all of the paraphernalia that goes with plein air painting and fly fishing, we drove. It was wonderful. We took a relaxed three days to drive to Utah and returned the same non-rushed way. In the middle he fished and I painted for a week using Park City as our base of operation. On the drive to and from Utah I did small paintings of the scenes along the road in my journal. I'll show some of them in a future post.

We had been to Utah to ski and had seen the state in the Summer but we were not prepared for the glory of Utah's Fall. Or the great fishing! The maples had turned a fluorescent red and the aspens were starting to yellow. The color is almost too much for a landscape painter to deal with. Frankly, it just doesn't look real. Painting it risks going down the road of sentimentality or cliche. As it was, most of the spots I found myself oil painting in were in the Provo River Valley near the good fishing waters of the Middle Provo River. No maples or aspen there, just the willows and cottonwoods of the river bottoms and long stretches of meadow. Fall color was obvious but not shouting at me.

I left home with about twenty panels primed with either a rusty red or a medium gray. It was good having the choice of grounds. Evening subjects turned out better on the gray panels. You can see a bit of the red ground showing on the image above. In the image below I used a gray panel. It turned out that not having to deal with the red ground helped me catch the mercury-like color of the water as it looked long after the sun had faded. In fact, I was doing this painting almost in the dark by the time I finished. The red you see around the mountains in the background are bits of the drawing I did on the panel using some thinned down alizarin crimson.

These two images were painted at the same site. The top one looks south toward giant Mt. Timpanogos, the second one, immediately above, looks north along a lower section of the Middle Provo.
I came home with thirteen paintings. I'm still trying to get to 200.

Sunday, September 20, 2009

Thompson Lake Again, and More on Grounds


Here is another small painting done the second afternoon I was at Thompson Lake. It is the same scene as the last post but the view is widened to take in more of the shore. Again, it was done on panel primed with clear acrylic gesso tinted with cadmium red.

Since my aim is to do 100 oil paintings as quickly as possible I decided to use up some pieces of bookboard that are about 1/8" thick. Too thick for the books I make but perfect for doing the little paintings. Most are now primed the warm cadmium red. The red is a good ground color since many of the paintings will be landscapes that are predominantly green. Red, the complement of green makes a nice vibration in those spots that are not covered with paint.

Some panels are primed with white acrylic gesso to which I have added a bit of pumice. The white is appealing since a painting can be blocked in with the color (or its complement) of the subject. As a pastel artist I almost always use white Wallis sanded paper. My process is to block in the painting with pastel and then wet it down "melting" the pastel into the paper. You could get the same effect by doing a watercolor underpainting. At any rate, there is something familiar about looking at a fresh, white panel. And the color just seems to sparkle on it. I have been using the same process with the oils by putting down an underpainting of thinned paint.

Other panels have been primed with the clear gesso (untinted), that way I end up with the natural, gray color of the bookboard. Having a medium value gray makes it easy to establish the values in a painting since your eye is not fooled by the stark white of the ground if that is what you are starting with. I tried one painting on this gray panel today. When I get it scanned I'll post it.

Thursday, July 23, 2009

Do those thumbnails!

Hayfield in July


Recently I was out scouting for good places to paint and came upon this newly mown hayfield in northern Washington County. Minnesota is gorgeous at this time of year. The day was sunny and it was later in the afternoon--perfect to begin to see the landscape defined by the shadows.

I made some quick thumbnail sketches (below). It is important to establish some abstract shapes to carry the painting and I also needed to decide how best to convey the sweep of the vista and yet zero in on the really interesting roll of the nearby fields. Thumbnails are invaluable to help establish the masses and format for a painting. Without some good "bones" it is pointless to continue. Get those established and you have a fighting chance to get a good painting.

The masses of trees on the left were so interesting and they swept nicely into the trees on the ridgeline. All together they made a nice shape that hung together as a single mass.

The sun was blistering hot by the time I finished the block in of the pastel. Maybe that is why the orange I chose for the closest part of the field seemed to be an appropriate color to use. I decided to stop and leave the piece with just a few layers of pastel. At this point I needed my umbrella and had not brought it. My wide brimmed staw hat was just not giving me enough protection. More work on the piece would have to wait for a return trip to the site or another day in the studio.

However, the sketches and block in make my favorite point: values and good shapes give you a darned good start.

Thursday, July 2, 2009

Working from A Photo

Here is an example of an experiment: working from a photo. I can count on one hand the number of times I have tried painting or drawing from a photo. Let's face it--the camera distorts what is "out there." One does not get the feel of the panorama in a photo. I my mind the artist is better able to depict the three dimensionality of the place and put it into a two dimensional format better than the camera. And I have friends who can spot a painting done from a photo in an instant. I would rather work from life. But one day I decided to spend the day on composition issues and did about 50 thumbnail sketches from photos. I was more interested in the composition than anything else that day so I thought photos I'd taken would work.

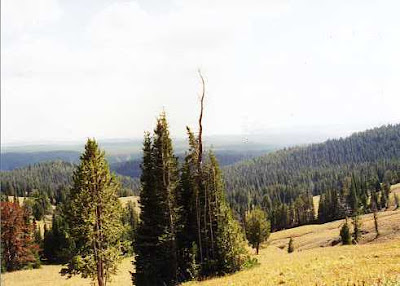
Below are two photos taken in Yellowstone Park followed by six of the thumbnails and then two stages each of two paintings.


1

What interested me was the bright grassy meadow against the dark trees.


2

This second photo shows continuation of the panorama--just some visual information but nothing that "grabbed" me.

Thumbnails
The question was where to crop the image. I ended up trying two options. First the upper left thumbnail, below, and then the thumbnail on the right.

More thumbnails

Using the first thumbnail I did a color study to see if I could work out capturing the feel of the day. Unfortunately I had not make a sketch of the scene and relied on the camera. For me a sketch has a lot more information than a photo. I have been able to develop paintings from sketches even without color notes. In a sketch your eye and hand do the editing and you get to the essence of what attracted you to the scene in the first place. And conveying that idea is what I want my painting to be about.
Below is stage 1 done on ColorFix sanded paper.


Stage 1

In stage 2, below, additional layers of pastel help push back the hills in the distance and give a little more shape to the grassy meadow.

Stage 2

The format was not working for me so I started a quick study on mat board coated with a few layers of transparent gesso. I like the texture of the brush marks and the gessoed surface allows me to wet the surface down after I lay in my first layer of pastel. You can see a bit of the underpainting where I have put down warm colors where the sun hits and cooler colors in the shady areas.
Stage 1 below.


Stage 1

Stage 2 of this study starts to tone down the intense yellows, give a bit of form to the trees and begin to soften up the distant hills.


Stage 2

The next several stages are yet to come. Time to put these studies away and return to them with fresh eyes.


Saturday, June 13, 2009

Using Art Materials

Stage 1


Stage 2

In a recent pastel class I taught I gave the class several pieces of an interesting (that means I don't know what kind it actually was) brown paper that my friend Roz Stendahl had passed off to me. The color and texture was much like the brown kraft paper you find in grocery bags but with a little more tooth. The paper came from Wet Paint in St. Paul in a 9x12" tablet. Though not archival, it is fun to work on and I'm going to try to find some more.

As an experiment I tested how it pastel would work on it quickly blocking in the main masses I see of the scene outside my studio window (Stage 1, above). The next test was to see how well the paper took another layer of pastel. I gave the painting a spray with Krylon workable fixative and started in again. The pastel took remarkably well (Stage 2 above).

Another spray of fixative and I worked more on the piece as my cousin Leslie looked on. Too much talking--I forgot to take a photo of the next stages. I gave the painting to one of the students so I can't show you the result but suffice it to say, the paper kept on receiving pastel although with less enthusiasm.

The most fun of this paper was the abandon with which the students used it in class. I handed out several sheets to each one and suggested they just go-for-it. After all, it was free paper and they could experiment without the concern that they are going to "ruin" "perfectly good" art materials.

Which brings me to the point of this post: Work often and try to forget the cost of the art materials you use. Your time is your most precious commodity. Yes, art materials are often expensive, but the way to become the artist you want to be is to use those materials--the more the better. Be confident that the Universe will find a way for you and, maybe, some free art materials along the way. Works for me.

Friday, May 1, 2009

Light on the Water

"Hungry Horse Evening," pastel, 6 1/2 " x 17 1/2."


A few weeks ago I was asked to give a talk on the subject of drawing and painting the landscape. The audience was a group of journalers who meet regularly at The Minnesota Center for Book Arts. The talk was to encourage the members who did not often (or ever) use the landscape as subject matter in their journals to give landscapes a try.

The subject of landscape painting is, appropriately, huge. But I needed to boil it down to something manageable in the time I had. After much thought about how it is that I do what I do when out plein air painting I came to the conclusion that my talk to could be summarized in one word: "Simplify."

For me it is a matter of getting down the basic masses and their values. Seems fairly simple to me now, but it wasn't always so. I think it has just taken years of looking and analyzing. And lots and lots of drawing. That said, I had to give them some other practical hints to take home.

I started to reflect on how it is that our preconceived notions sometimes get in the way of seeing. And I remembered the old problem most people have when they draw a face: the eyes are usually drawn way too high on the head resulting in a tiny forehead and a funny looking drawing that does not look like a person. We learn eventually to trust the classic diagram of a head based on actual measurements that shows the correct placement of the eyes to be smack dab in the middle of the face. The other parts of the face like the nose and mouth, distance between the eyes, placement of the ears, et cetera, really are where they are because we can measure them. Once we have measured the distance between features that usually calms down the part of our brain that is yelling at us to say "The eyes are too important. They must be higher on the face than half-way between the chin and the top of the head!"

So, I wondered, if there was an analogy that would help describe something about the landscape. Probably not since there are always some exceptions to the "rule." However there is a sort of rule-of-thumb useful for general lighting conditions from the famous artist/teacher John F. Carlson, author of Carlson's Guide to Landscape Painting. First published in 1929 it is now available from Dover Publications, http://www.doverpublications.com/. In it he describes his Theory of Angles.

Carlson believes that "the prime cause of the big light-and-dark relations in a landscape is the angle which such masses present to the source of light (the sky)." In a nutshell Carlson points out that there are four basic planes in a landscape: the ground or flat-lying plane, the vertical plane of the trees, the slanting plane of the hills or mountains and the arch of the sky which is the source of light. "Our landscapes' prime elements--tree, ground, mountains, etc--receive light from the sky differing degrees of light depending on their plane...." p. 33. The result is that the sky is the lightest element, the ground the second lightest, the upright trees the darkest and the mountains/hills the lighter than the trees and darker than the ground plane. (With some exceptions, for example, when the ground is covered by snow it will be lighter than the sky except for the part of the sky near the sun.)

The audience seemed to understand that. And then one of the audience asked me a question about light on the water.

Hmmm. A good part of my life has been spent staring at water or thinking about how light hits the water. In particular the great expanse of Lake Superior. I have, for hours, stared at, drawn, painted and studied the way light changes the look of the water. When she asked me how The Theory of Angles applied to water I could only think of the number of times I had seen it darker than the sky and then of the times it was lighter than the sky--or both at the same time.

(Below is a gouache painting I did one summer while looking out over Lake Superior. Here the water is darker than the sky, but the same scene on a cloudless day might look any number of different ways. In some cases the water would be the same value as the sky to the point that it is impossible to see the horizon. The painting, Hungry Horse Evening, at the beginning of today's entry, illustrates the "rule" that the ground plane--in this case the water--is darker in value than the sky.)


Untitled, gouache, 4" x 6."

As I drove home I realized having a set rule for how light behaves on water was one of those times as Carlson says, "If the student will once recognize the general and everyday value-differences in anything, he can easily see for himself any incidental departure from this common condition. He will in time despise any 'rule' concerning painting." p. 42.

So, in the case of water, look. Then trust your eyes.

Saturday, April 25, 2009

From My Sketchbook: Testing Some New Colors

Last week I talked about two new watercolors I tried: Daniel Smith's Transparent Red Oxide and Schmincke's Translucent Orange. (Note the Red Oxide is in tube form, the Translucent Orange is in pan form.) I did several experiments in the field and show some of them here. These pigments used with Cobalt Blue or Indanthrene Blue (PB 60) make some beautiful grays that are really good at capturing the array of grays the deciduous trees and bushes present at this time of the year.
Those of you who know my pastel paintings might wonder why I am trying to portray local color since my paintings are often anything but! Must be from looking at leafless trees so much of the year in Minnesota and wondering how to depict them poetically. This month, while waiting for the leaves to come out, I am simply acknowledging they are simply many, many shades of gray.


These images are from a small 4.5" x 5.5" journal made with Folio paper by Roz Stendahl. It is perfect size for carrying around on walks. I can paint in it and then hold it open while it dries and I am off to the next scene.

Saturday, April 18, 2009

Testing a New Daniel Smith Watercolor


Note: Click on the images to view enlargements.

This is an interesting time of the year for a landscape artist: the leaves are not out yet so the structure of the trees is still plain to see. The snow is gone and the marsh grasses are chlorophyll-lacking shades of buff, ochre, khaki—well a zillion shades of brown. For those of you who know my work you know I am not one who is wedded to using local color for my paintings. However, the amazing varities of browns out there have caused me to try to duplicate some of the colors I see.

The solution came in a conversation with my friend Roz Stendahl (famous for, among other things, her galactic knowledge of pigments). The subject of (what else?) pigments came up. We often talk about favorite combinations of this or that pigment with a favorte: PB 60 aka Indanthrene Blue. While she tends toward a more muted result in her paintings I still need those essentail neutrals to show off the intense colors I love. We were discussing the interesting muted colors one sees outside now before the green-up, including the subtle color made by masses of red dogwood. As a suggestion for that pinky-red, Roz mentioned some of the new colors Daniel Smith has introduced, which she had just mentioned on her blog— in particular: Transparent Red Oxide. And soon we were on to the discussion of a great Schmincke color: Translucent Orange.

I made a trip to Wet Paint art supply store, bought my two new colors and the experiments began. The photos show some test spots.

In the first photo above, I have laid down some PB60 and Transparent Orange and mixed them on the paper. To the right (in the little rectangle) are the same pigments mixed on the palette. You can see one gets a much livelier result when the colors let themselves mix on the paper. The swoosh to the right of the rectangle demonstrates how Transparent Orange plays out going from wet to dry brush. I noted a shine indicative of gum arabic when the paint was applied thickly. I don't mind that but will have to keep it in mind so I don't get that effect when I don't want it.


This second photo above shows some experiments with PB 60 and Daniel Smith's transparent Red Oxide (as well as a reference stroke of Burnt Sienna gouache). Next there are two connected swooshes showing Transparent Red Oxide combined with Cobalt Blue! Fabulous grays result from both combinations. The first combo (on the far right) absolutely duplicated the gray basalt rocks found on the north shore of Lake Superior. The second is exactly right for those elusive grass colors.

Just for comparison I laid down a bit of Burnt Sienna gouache. It is a cooler, quieter brown next to the Red Oxide watercolor. (Of course we a dealing with a gouache to watercolor comparison so it is not apples to apples.) The Red Oxide has a kind of snap to it along with a very nice sedimentation. I love the color and will try replacing my Burnt Sienna with it in my watercolor palette. My experiments with the Red Oxide resulted in a bit less of the pinky Pipestone type brown that Roz found but it is a lovely color nonetheless. (She only had a dried paint spot to work from and I was using fresh tube color—that may be part of the difference.)

Next week I will show you some of the little landscape sketches I've done with the new colors. For now I am going outside! 70 degree weather in Minnesota is too good to miss after a long winter.

Saturday, April 4, 2009

Lake Country Pastel Society Spring Show

The Lake County Pastel Society Show, Pastel Springs, is open now until May 8. I was there on Monday to help check in the entries. Wow! It is going to be a challenge for our judge, Anita Louise West, to choose the winner from over 100 entires. Ms. West, famous for her own pastels, is in the Twin cities for a portrait workshop being held this week by Leslie DeMille. I have been a follower of Ms. West for many years--she is nationally known for her plein air landscapes.

So here is just one good reason to be a member of the Lake Country Pastel Society: Each year the Society sponsors a three to five day workshop lead by a pastel artist of national stature. In conjunction with this year's workshop, Mr. DeMille will give a public demonstration Sunday, April 5 from 5:30 to 8:30 at the New Brighton Family Center, 400 10th St. NW, New Brighton MN. The demonstration is free for members, $15 for non-members.

Come see the show at the Sherburne County Government Center and then check out the Pastel Society. In addition to first-class workshops, we meet six times a year for critiques, demonstrations and guest speakers. Spring and Fall shows are held each year. Dust in the Wind, the Society news letter, is a valuable source of information about materials, workshops, exhibits and grant opportunities.

Saturday, March 21, 2009

New Class Added


Above: Fishing the Gallatin
, © Diane Wesman, approx. 8 x 12". Pastel on Canson Mi Tientes Paper.


Past students have asked for another pastel class at Como Park Zoo and Conservatory. So now we have one: Tuesdays, from April 21 to May 26, 6:30 to 9 p.m. We will meet to work in the luscious medium of pastel. This will be an intermediate class for those who have taken a pastel class from me or for anyone who has some experience working with soft chalk pastels.

Use the link to Como Park Zoo and Conservatory to sign up.

When the weather permits we will work outside. For those who would like to start landscape painting, they will have that option. Others may choose to stick with painting their favorite plants and that is OK, too.

Fishing the Gallatin, above, like many of my paintings, was done while my husband was fly fishing. Here I used Rembrandt pastels. They are the real work horses in my pastel collection. They travel well, are widely available and economically priced.

We won't have this stunning vista but we will have Como Park! I hope you will join me to explore the wonderful possibilities of pastel.

It's Spring—Time to Start Something New


Left: Purple Marsh, ©2009 Diane Wesman, 9 x 12 inches, pastel on board.

Spring is officially here. The days are getting warmer in Minnesota. This is my last plein air painting for the winter. It captures the view across the marsh from my house.

Welcome to my blog. I'll be an occasional blogger writing from time to time about my artwork, how I think about painting, and the challenges and rewards of landscape painting. I'll also share information about materials and techniques. You'll get the opportunity to look inside my sketchbook and see how those entries evolve into paintings. My journals will provide a window into my life.

I hope that my blog will provide information to past and future students. I teach pastel painting at Como Park Zoo and Conservatory. You can view additional selections of my artwork at Project Art for Nature.

In Purple Marsh (above), the intense purples and rusts are colors typical of my winter palette. They reflect the moodiness of a late winter sunset. As things green up I'll start using greens and pinks from my spring palette. But, never one to stick to local color, you will see plenty of purple and any other deep color that will give me the dark values I love.

See Purple Marsh in person at The Lake Country Pastel Society Spring Show, March 31 to May 8, 2009 at the Sherburne County Government Center. Join me and the other artists at the opening reception, Saturday, April 4, 2 to 4:30 p.m.